Want to take better nature photos? Whether it’s landscapes, wildlife, or trees and plants, these 12 tips will help you take your nature photography to the next level.
1. Plan Ahead

Nature photography is all about trying to wrestle a tiny bit of control over so many factors that seem out of your control (and mostly are). The sun, the clouds, the water, the weather, how an animal reacts, even how a leaf blows, can make or break your photo.
As a result, the most important tip is to plan as much as possible. Here are a few specifics to get you started:
- Know when and where the sun will rise and set (Scott Stulberg got us all to use the app Photopills for this)
- Know your subject (more in point 10)
- Apply for any necessary permits for hiking trails etc
- Consider how the weather will affect your photos (and gear) and plan accordingly
2. Choose the Best Light for Your Subject

Often, beginner photographers are hit with the perhaps oversimplified advice that golden hour light is best because the light is soft and the sky is more colorful. However, there are two golden hours, one at sunrise and one at sunset, each slightly different.
In addition to the softness of the light, you’ll want to consider the direction of the light. Since the sun rises in the east and sets in the west, you can decide if you want to shoot during the early or later golden hour because of how you want the light to hit your subject. Having the sun at your back wil cast a nice even light onto your subject, while having the sun behind your subject can create a dreamy glow and change the entire mood of an image.
Note: Some lenses handle flaring and maintain contrast better than others in backlit situations.
3. Experiment with Light
This might seem like a contradiction after saying to choose “the best light”, but for beginners learning what the best light is means experimenting. Find something you like, shoot it at sunrise, sunset, mid-day, get high, get low, walk around the front, walk around the back, and keep shooting.
Shooting from all of these angles and at various times of day will let you evaluate the ways that light can be cast onto an object and ultimately know what “the best light” is for you and your subject.
4. Keep an Eye on Your Exposure

Learning to shoot in manual mode will give you ultimate control over your images and In the age of mirrorless cameras, learning how to is easier than ever, but comes with a slight risk.
Beginners often set their exposure and then forget to adjust as lighting changes, which it constantly does for a number of reasons such as a cloud moving above or the sun changing position.
Simply keep an eye on your light meter or histogram, adjust accordingly before each shot and you should be good. In harsher lighting conditions, you can shoot three photos of a scene: one regular exposure, one +1EV, and one -1EV in case your subject is lit better in an underexposed or overexposed overall scene or if you decide to blend them in software later.
Note: Don’t obsess over “stops of light” and “EV.” Most modern cameras have a bracketing mode to assist with this.
5. Shoot RAW + JPEG

All cameras by default are set to shoot only in JPEG so shooting RAW will require you to adjust some settings. Each format comes with advantages and disadvantages. JPEGs these days can look great straight out of camera. But it’s a compressed file format so you won’t have much latitude to make adjustments to exposure, white balance, colors or save the odd shot that you miss.
On the other hand, RAW files provide you enormous flexibility for post processing. Keep in mind that RAW files straight out camera look dull and lack the sharpness and contrast that JPEGs have since they are meant to be worked on. The excitement of processing and taking control of one’s images leads many beginners to take things a little too far at times.
Having a JPEG of each image as well gives you a baseline to compare your edited image to and helps determine if things are looking over processed and whether you need to dial it back a bit.
6. Use a Tripod

A tripod will open up vastly more opportunities for you in nature photography. Sure, modern digital cameras can perfectly expose almost any scene with the need for a tripod. However, there are three ways in which a tripod earns its place in your bag.
- Long Exposures- Using slow shutter speeds allows you to drastically transform a scene by smoothening water and clouds or allowing you to capture star trails. Additionally, you can use a lower ISO resulting in less noise. (keep in mind that slow shutter speeds also let in more light so a neutral density filter may be needed to compensate)
- Exposure Bracketing- Ensuring that your composition is the same between frames opens up the ability to take multiple images and blend them together to get a balanced exposure.
- Control over Depth of Field- The first thing many of us do when we get our first prime lens is shoot EVERYTHING wide open at f/1.8. In nature photography, though, you’ll often benefit from more depth of field. Photos taken at f/1.4 may look absolutely beautiful and pin-sharp on the back of your camera, but turn out to be slightly out of focus by the time you look at them on your computer. Using a tripod will allow you to use a higher f value giving you more control over your depth of field resulting in a greater number of in-focus photos.
7. Experiment with Depth of Field
Photography is an art so there’s no hard and fast rule to whether you should be using a deep or shallow depth of field (blurry vs sharp background). As a beginner out in nature, it’s best to just experiment a lot and find what you like in different situations. To get you started, here are the general benefits of shooting wide open vs shooting stopped down.
Shooting wide open- Using low f values like f/1.8 or f/1.4 can give you a super blurry background that provides a natural subject separation and helps draw the viewer’s eye right toward your subject.
Shooting toward the sun with a wide aperture allows the highlights to bloom resulting in an image with less contrast. Many find this desirable and describe it as dreamy, or “filmic”

Shooting stopped down- Using higher f values like f/5.6 or f/8.0 (the most narrow f values before diffraction and autofocus become a problem) can yield sharper images, with higher contrast, and more saturated colors from a technical perspective.
From an artistic perspective, having a more in focus background will put your subject into context by way of its environment. Rather than subject separation drawing the viewer’s eye to your point of focus, you can use other compositional techniques like leading lines or a hierarchy of objects.
Also, shooting toward the sun while using a narrow aperture creates a sunburst effect, which can be a nice addition to landscape photos.

8. Learn Composition
Photography can be described like cooking. Having great ingredients, like beautiful light, an interesting subject and a pleasing background is crucial. Just as important, is your recipe for putting those things together, otherwise known as composition (credit to Marc Silber for this analogy). Ask yourself “what do you want your viewer to focus on?” If multiple things, “in what order?” “What is the relationship between the objects in the frame?”
Answering these questions will help you decide what compositional technique you want to use.
Below is a list of a few techniques that every beginner should get familiar with.

- Converging Lines
- Layers (also called foreground interest)

9. Study Other Genres and Artistic Disciplines

Think about a magazine cover, a painting, or a sculpture. What moved you about it? How can you incorporate that into your photography?
Here are a couple of ideas
Try to understand what the light is doing in your favorite painting and attempt to recreate it in a photo.
Look at the composition of a photo or painting. Look away and back at it several times and try to understand how your eyes move along the image. Then when in nature, see if you can create that same sense of movement throughout your photo.
10. Study Your Subject
Your first few hundred or few thousand images will most likely be an absolute smorgasbord of different subject matter: mountains, hills, trees, flowers, fish, birds, deer, your family etc. Then you find it! The one subject you want to keep photographing more. You’re excited to go out and shoot weekend after weekend until…. You hit a plateau and the pictures aren’t improving.
After you can repeatedly take a well-exposed and well-composed picture of your favorite subject, the next step is learn your subject. This is the key to truly great nature photos. The most iconic nature photos are the result of studying, understanding, and anticipating the subject to know when something special was going to happen before hitting the shutter at just the right time.
Here are some things to ask about your subject to learn how to photograph it better:
- What does it eat?
- Where does it eat?
- What time does it wake up?
- When does it walk/eat/sleep/swim/bloom?
- What season does it migrate/change appearance etc?
11. Break the Rules of Photography
Learn the rules of photography. Then, break them! While the rules can give you a guideline to produce pleasing photos in the beginning, they might put you in a box where you’re always producing photos that are the same as ones you’ve taken before and the same as other people’s photos.
Of course, we still want to emphasize the studying part. Knowing why the rules work and the underlying concepts can help you to creatively rebel rather than throwing things at the wall and seeing what sticks.
12. Take the Right Gear for Your Nature Photography
The right equipment can make all the difference in your nature photos or at least make the process much easier and more enjoyable. With so many options, it’ll mainly come down to your preference and what you’re photographing. This is a lightning round of points to consider about the major categories.
Cameras
There is no best camera system, but among all camera bodies, you’ll be choosing between crop or full frame and mirrorless or DSLR.
- Crop bodies have a smaller sensor and higher pixel density which can effectively give you 1.5 times more reach for shooting wildlife.
- Full frame bodies are great for low light situations such as astrophotography and other scenarios where wider is better.
- DSLR cameras still have access to a wider library of lenses including telephoto and super telephoto lenses, with the downside that they experience viewfinder blackout from the mirror flipping up. However, the optical viewfinder provides an advantage for tracking fast-moving subjects like birds.
- Mirrorless cameras like the Sony A9 shoot up to 20 frames per second with no viewfinder blackout and the new Canon R5 has an animal eye auto focus system capable of locking onto and tracking the eyes of an array of species. However, the inverse is true for their lens selection compared to their DSLR counterparts.
Lenses
The right lens will depend on your subject, composition and camera system. Generally, you’ll need to choose between a wide-angle or a telephoto lens. Here are the basic differences.
Wide Angle
- Wide field of view
- Closer focusing distance (good for detail shots)
- More of the image front to back will be in focus (more depth of field: less bokeh)
- Less compression (the background will appear further away)
- Compositionally, wide angle lenses provide more of the environment and context. As a result, they take a bit more work and thought to produce a good image.
Telephoto
- Narrow field of view with the ability to see things that are far away
- More compression (the background appears closer)
- Less of the image from front to back will be in focus (More bokeh and a shallower depth of field)
- Compositions will be heavily subject focused meaning whatever you’re taking a picture of will probably take up most of the frame
Read [Top Ten Nature Photography Accessories]
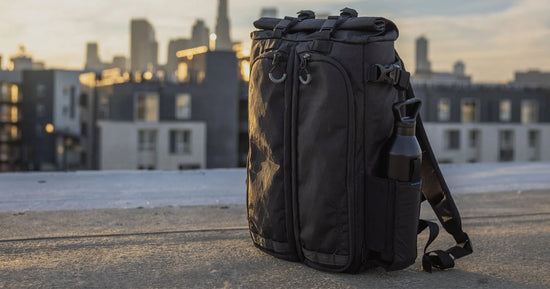
Camera Bags
There are more camera bags being produced and in more styles than we could even begin to address here. The sign of a great camera backpack is that you never really have to think about it. Ones that aren’t quite right for you might leave you feeling sore or frustrated that packing and accessing your gear feels like you need to solve a riddle. You can probably already guess our favorite camera backpack.
The Gura Gear Kiboko was developed by photographers to be the ultimate camera backpack. Every detail was obsessed over to ensure it is easy to pack, comfortable to carry, and quick to access. Additionally, we chose the best materials so that you don’t have to choose between a light pack or a durable one.
Bottom Line
There you have it. 12 Tips from our team to help you improve your nature photography. Have another tip we didn’t cover? Share it below.